The past year was a difficult one for Interrail travel. However, we wanted to ensure we continued to improve our website during this time, so that when people are able to start Interrailing again, we provide a great experience and make planning your Interrail trip as easy as possible.
So, here are some of the improvements we’ve made in the past year:
Improved the interactive map
We wanted to improve our planning tool in the following areas:
- Making it possible to add destinations directly from the map
- Showing how feasible it is to get between different destinations
- Helping you to find destinations to add to your route
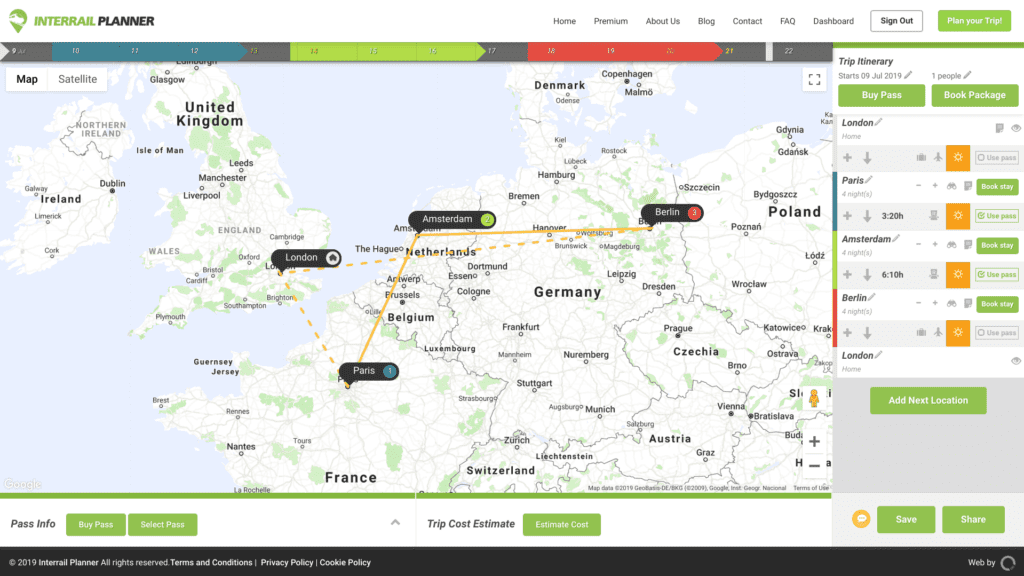
To do this, we introduced an overlay to the map:
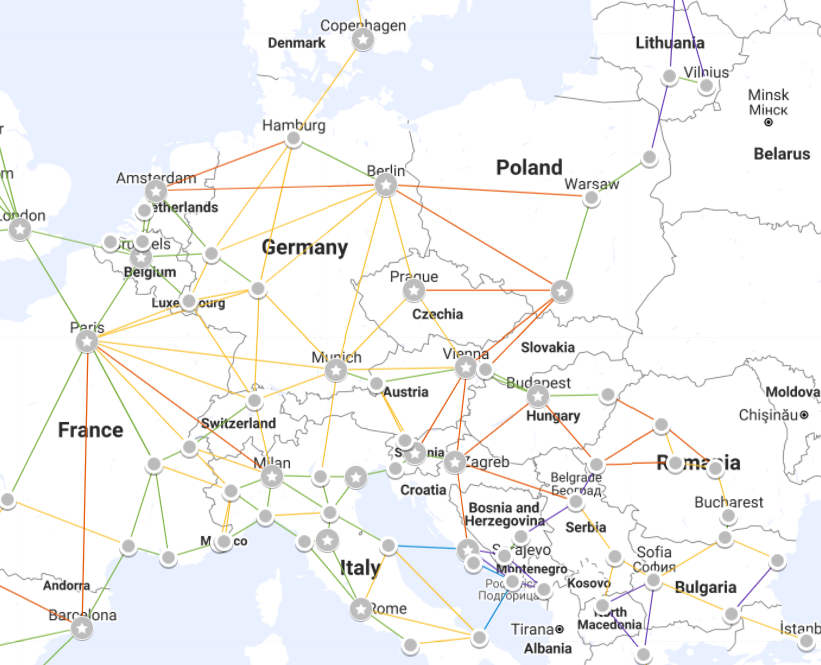
This new overlay displays all of the common Interrail destinations, with stars to indicate the most popular ones. We worked out which ones to include based on data from all of the plans created on our website to date. This aims to help you discover destinations you could add to your route that you may not have been aware of or to find a sensible place to stop between two distant destinations.
If you tap on any of the destinations, you can add them to your plan directly. You can still add other destinations that are not on the map using the existing ‘Add destination’ button.
In between the destinations, we have added coloured lines to indicate the difficulty of getting between those destinations. Green is a short rail journey, yellow is medium, and red is long. Blue indicates where ferries can be used and purple indicates where you’ll probably need to use a bus because a rail journey isn’t possible. We hope this information helps everyone to create better, more feasible route plans.
We increased the size of the map on mobile web, so that people could take full advantage of this new feature. You can also hide the overlay if you like by using the ‘Route only’ toggle.
Introduced unlimited stopovers
As mentioned in a previous blog post about product improvements, one of the most requested features when we first launched was the ability to add stopovers (aka destinations where you do not stay the night). We introduced stopovers soon after launch, but we didn’t go far enough: you could only add a maximum of 1 stopover in between destinations where you were staying the night. We continued to receive the occasional feedback about this, so have now made it possible to add unlimited stopovers between destinations!
We’ve also made sure that this works perfectly with Interrail Planner Premium’s pass tracking feature, so it always counts your travel days accurately, no matter how complicated your route gets with stopovers and night trains. (That one required some intense testing though!)
Introduced autosave
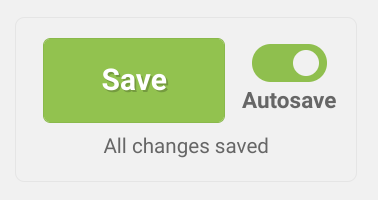
These days, any product that requires saving your progress will have an autosave feature; it’s a pretty basic expectation for this sort of software. Planning an Interrail trip also takes a fair amount of time and effort, so losing your progress is really not a nice experience. To bring the product up to basic expectations and reduce the chance of losing your progress, we have now introduced an autosave feature, which automatically saves your changes every 60 seconds (provided you’re logged in and have saved the plan at least once before).
Introduced re-arrange functionality
Until recently, to re-arrange destinations in your Interrail route, you needed to delete a destination from one place and then add it in another. This was highly inconvenient, so we have introduced a feature to more easily re-arrange destinations. Since launch, the feature has been used by ~25% of logged in users, which means there was clearly some unmet demand for this feature.
Explained night train rule more clearly
A key theme from our user research is that people need help understanding the rules of the Interrail pass. One area that is particularly confusing is how night trains work with an Interrail pass. We wanted to make sure the night train rule was clearly explained by Interrail Planner. Now, when you add a night train to your trip, you will see a pop-up explaining the rule – rather than explaining the rule up-front, we thought it was best to explain it at the point where it becomes relevant.
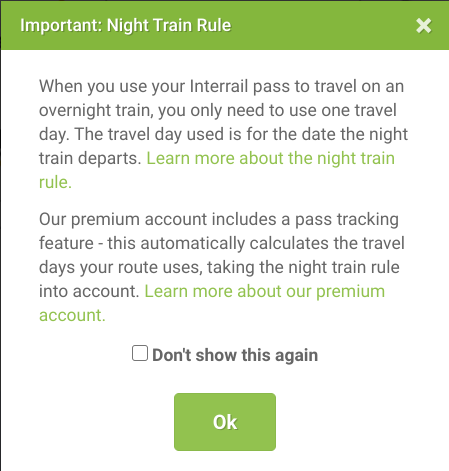
The pop-up links to our blog post explaining night train rules, which we hugely improved by adding an FAQ, clear examples, and even a quiz to test your learning!
Made trip dates clearer
Keeping track of dates is crucial to a successful Interrail trip; you need to make sure you are booking your accommodation for the right dates and using your Interrail pass within the dates it is valid for. Dates have been central to the Interrail Planner design from the beginning, but we think we’ve made them a lot easier to manage with our most recent change. To see how we got here, let’s take a little look at the history how we’ve tried to present dates within Interrail Planner.
Our first ever design actually put dates at the centre of everything – as seen below, the planning tool was just going to be one big calendar!
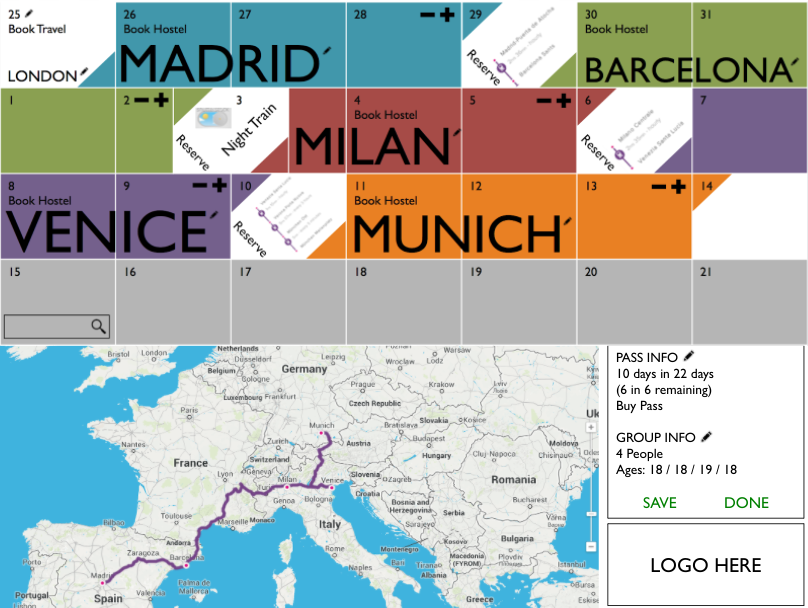
This was built by our developers, but was really hard to use, mainly because the bigger your plan got, the smaller the map got! Also, it was not mobile-friendly whatsoever.

Luckily, that version never saw the light of day because our developers suggested a much more elegant solution, where most of the functionality was broken out into a trip itinerary feature. This worked well on desktop and on mobile.
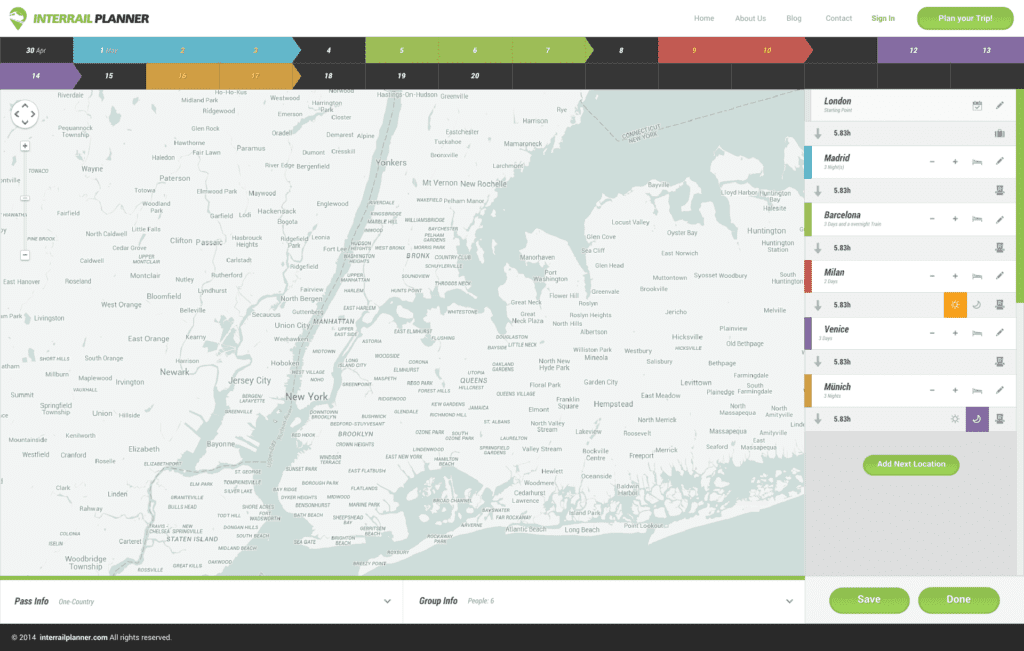
The version that has been live since launch very closely resembles this wire frame: a calendar along the top and a trip itinerary for the key functionality, tied together with colour coding for each destination.
However, this design still had its flaws:
- The calendar was completely missed or not understood by some users
- Cross-referencing the calendar and trip itinerary by colour was not the easiest way to see what dates you were planning to be in each destination
- It was hard to tell which day of the week you were in each destination. This is useful in case you want to make sure you are in a certain city for the weekend, for example. (The calendar did use gold text to indicate which dates were the weekend, but this was completely unintuitive.)
- The calendar completely failed at displaying stopovers and was preventing us from introducing unlimited stopovers (one of the other changes discussed in this post)
- As the calendar was still present at the top, it still didn’t fully solve the issue where the bigger your plan got, the smaller the map got!
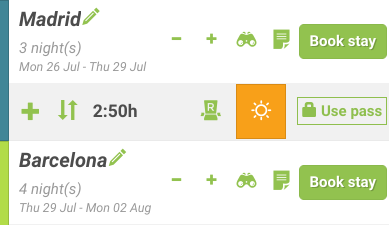
Our most recent changes attempt to solve these issues. We’ve removed the calendar entirely and moved the dates into the trip itinerary for each destination – effectively, we’ve totally departed from the initial calendar design and fully embraced the trip itinerary. We’ve also included the days of the week to make it super clear which days you’re in each destination.
Improved sign up and log in forms
Our sign up rates were not as high as we would have liked, so we took a look at why this might be. After researching best practice and reviewing our sign up and log in forms, we realised there was a lot that we could do better, such as:
- Using ‘Log in’ and ‘Sign up’ rather than ‘Sign in’ and ‘Sign up’, to more clearly differentiate the two options
- Using two distinct pages for ‘Log in’ and ‘Sign up’ rather than having them on a single page like we were doing
- Using the correct input type for each field (e.g. email input type, so that the keyboard on mobile includes useful characters like ‘@’)
- Having a single password field on the sign up form with a show/hide option, rather than having a password field and a ‘Repeat password’ field. Both help to make sure the password was typed correctly, but the former is less effort for the user.
- Improving the language, placement, and timing of error messaging
The screenshots below show the before and after.
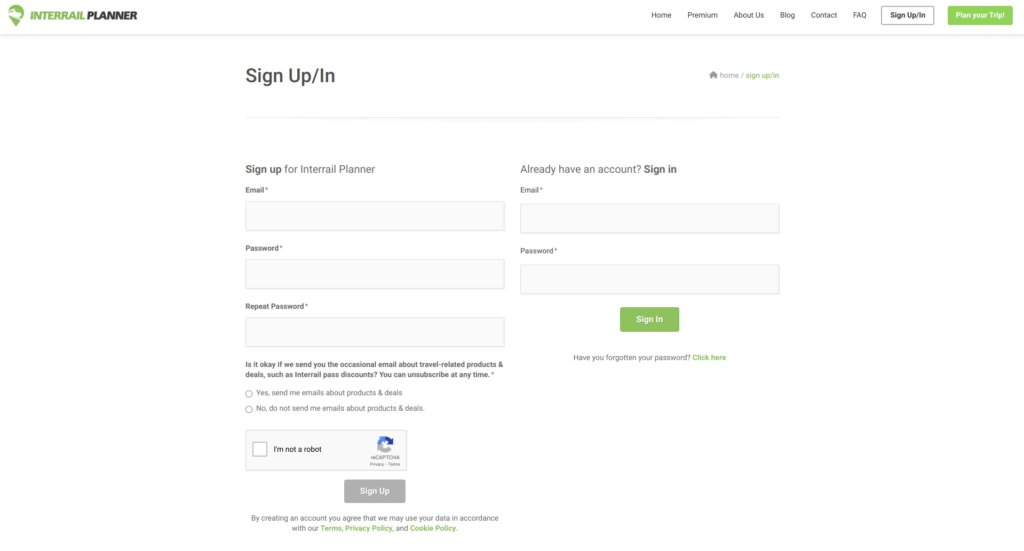
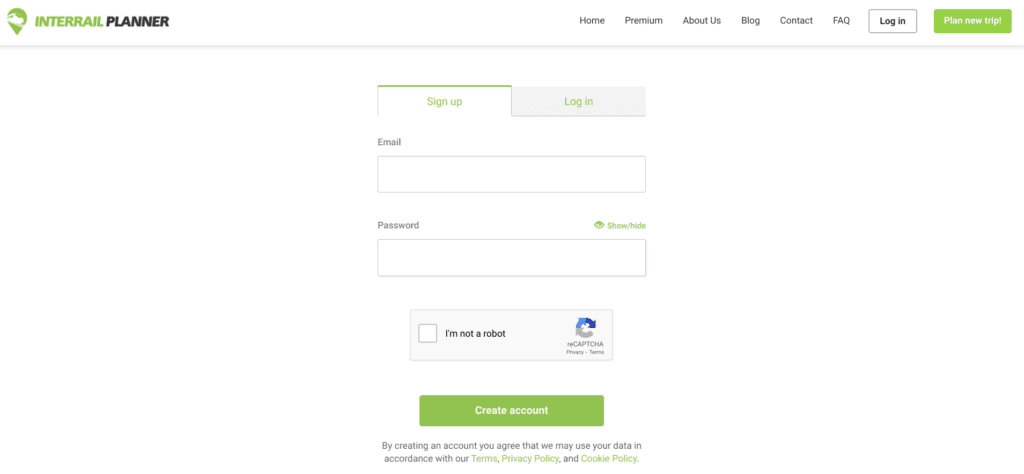
By making these improvements, the sign up rate increased by ~30%, which shows that the forms are now much easier to use.
Updated text
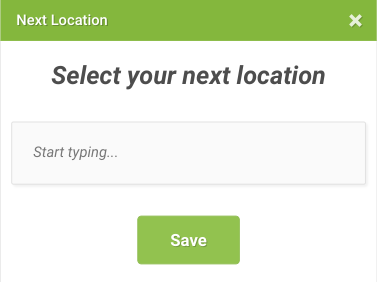
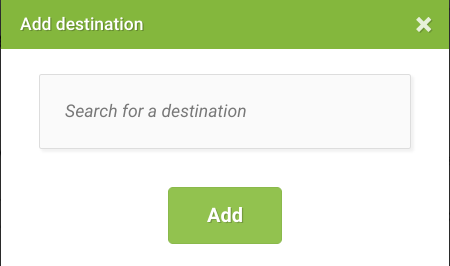
We hadn’t really updated the text on the website since we launched. Some of the instructions weren’t clear and we were inconsistent with the language we were using (e.g. using the words ‘location’ and ‘destination’ interchangeably). We took this time to do a full review of all the text on the website and update it to make it clearer. The example below shows how we improved the pop-up for adding destinations in particular:
- The pop-up title, ‘Add destination’, now makes it more clear what you are doing, without the need for the big, distracting text saying ‘Select your next location’
- It is clearer that you are supposed to use the box to ‘Search for a destination’, rather than a vague instruction to ‘Start typing’
- The main call-to-action is now ‘Add’ instead of ‘Save’, which is a clearer indication of what the button does
- The word ‘destination’ is used instead of ‘location’ throughout the website, as demonstrated here
Improved loading speeds
We improved the speed the website takes to perform certain actions, such as adding and editing destinations in your route. We also added a nicer loading wheel, to make the experience feel a bit more polished when you are waiting for things to happen.
Introduced country guides
We want to provide as much help as possible to plan your Interrail trip, so we put a lot of effort into the written content we provide in addition to our planning software. This year, we’ve written extensive country guides to help you learn everything you need to learn about a given country. These guides include a country overview and detail the top destinations, hostels, and events in each country – among other things! We’re still working on getting them all live on the website, but all major countries (such as France, Italy, Spain, Germany, The Netherlands, and Croatia) are now available.